There are many KLR 650 mods that you can do to modify its performance and comfort, but not all of them are actually worth your money. Whether you want more power, better suspension, or better overall comfort for your KLR, you’re in the right place!
In this article, I’ll show you:
- The best upgrades & mods for performance, comfort, and protection based on your specific needs
- Why each mod may or may not be right for you based on where you’ll be riding & your budget
- How to get the most performance and comfort by combining the right mods
Before you start modifying your dual sport bike…
It’s easy to start throwing parts at your dirt bike or motorcycle to upgrade the performance, and then when you go to ride it, you find that it doesn’t feel or ride the same. That’s because it’s easy to make the mistake of doing too many mods at once or not properly planning which ones work well together.
You see, just upgrading the suspension or tires might give it more performance, but it really depends on where you’re going to be riding and what your preferences are. Most stock bikes already work very well, so if you don’t want to blow out your savings account, choosing the right mods can save you a lot of money while still giving you a better or more comfortable KLR 650.

Where do you ride most?
The KLR 650 is a fairly versatile motorcycle, so it can be safely ridden on many types of terrain. Before buying and upgrading, you need to figure out what type of terrain you’ll be riding on the most.
If you plan to do more highway miles on the pavement, then you’ll want the best mods for riding on the street to make it more comfortable on long-distance trips.
But if you’re mostly riding off-road, then you'll want trail riding mods so that you will have more confidence in the dirt.
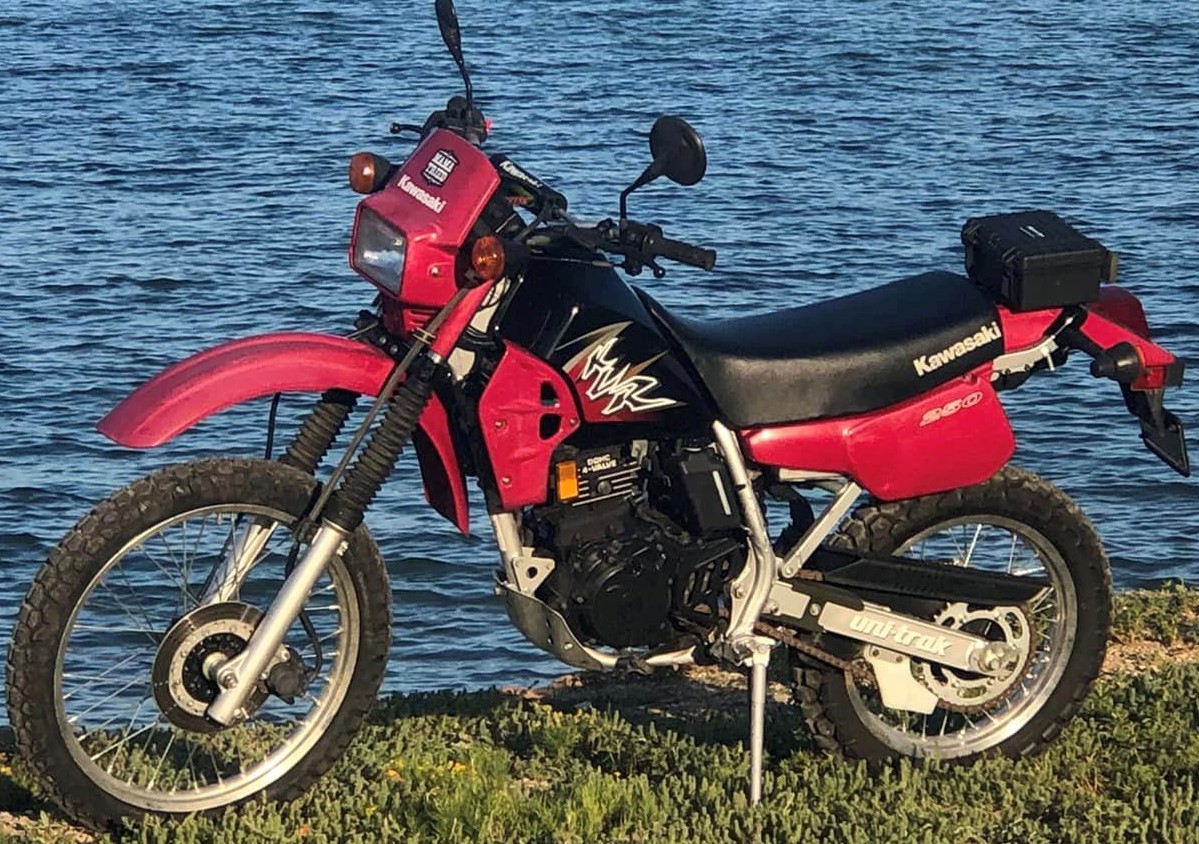
Which generation KLR650 do you have?
One more thing before getting started is knowing which generation Kawasaki KLR 650 you have. When buying an aftermarket part, some things may not fit all of the model years, so please keep this in mind so you don’t buy the wrong part and then yell at customer service on the phone or by email!
Here are the 3 different KLR650 generations by their model year:
- 1st gen: 87-07 (Carb)
- 2nd gen: 08-18 (Carb)
- 3rd gen: 2022+ (EFI)

Airbox/Intake mod
One small reason why the KLR650 is so durable and reliable is that it keeps a lot of dirt and debris out of the air box. The cleaner the air that goes through the intake, the longer the engine will last because dirt eats away at the metal parts, wearing them out much quicker, which leads to needing a rebuild.
However, since the Intake is so restricted, you’re missing out on some potential power and better throttle response - especially if you upgrade the exhaust and/or engine. So, you remove the snorkel if your KLR air box has one, or you can cut an “L” shape opening on the top of the air box for a big potential increase in the air coming in.
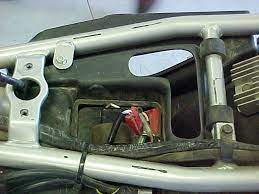
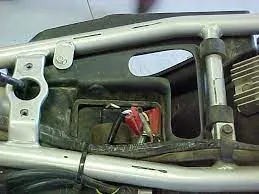
This also increases the chance of more dirt and water coming in, but it’s not likely unless you’re riding through a deep mud hole.
You can also add a few 1” Uni air box vents (Amazon) for better airflow without a much higher risk of sucking in dirt through the carburetor.
Will you need to re-jet after an air box mod?
In most cases, you will need to adjust the jetting after uncorking (opening up) the air box. When you increase the amount of air going to the carb, this will generally create a lean air-fuel mixture. A quick fuel screw adjustment can potentially fix this issue. You also might not feel much, if any, horsepower increase after this mod until you properly adjust the jetting.
Carb Jetting - more benefits than you think
A stock Kawasaki KLR 650 (1st & 2nd gen) runs pretty well if you leave them completely stock, but you might be able to get some more performance after some slight jet tuning, as well as a better running motorcycle.
Stock jetting:
- Pilot: 40
- Main: 145
Recommended jetting for 1000’ ft. @ 70F deg (uncorked):
- Pilot: 45
- Main: 155
- Needle: 2 shims under clip (or use KLX needle)
- Fuel screw: 1.5-2.0 turns out
You can buy the individual jets fairly cheap, or if you just want a kit, you can get the 6 Sigma Jet Kit (Amazon) for a reasonable price and it comes with everything you need to increase the intake and carb performance on any KLR 650 from 1987-2018.
The “22 Cent” mod - what is it?
It requires using two #4 Stainless steel washers (Amazon), which normally cost 22 cents for a pair of them if you go to your local hardware store. You simply install them under the stock needle clip on the carburetor throttle slide.
This raises the needle, similar to adjusting the needle clip position on an adjustable needle. It makes the air-fuel mixture slightly richer, giving you a better throttle response because the stock jetting is often tuned too lean - especially if you modify the intake or exhaust.
KLR 650 Suspension upgrade
You have to understand that the KLR 650 is a big and heavy dual sport bike, so don’t expect it to EVER handle well off-road like a trail bike that weighs under 300 lbs. With that said, the best first suspension upgrade is setting it up for your weight and riding style.
The stock suspension is soft and plush, which is great if you’re a beginner and riding on the street or gravel roads. But if you start adding weight (gear - or to your belly!) or ride more aggressively, the suspension will feel “wallowy” (bouncing) and will bottom out more easily - fully compress (you’ll feel/hear a “clunk!”)
Forks
If you’re a heavy guy that weighs over 200 lbs, you’re packing a heavy load, or you just want more performance, then you’ll want to upgrade to some stiffer progressive fork springs (Amazon).
This will help prevent the front end from diving under braking or just blowing through the stroke and feely too “springy” like a pogo-stick.
Poor man’s re-valve
You can also use heavier-weight fork oil (Amazon) to make it feel stiffer. Heavier oil slows down the compression and rebound, so it’s like a poor man’s re-valve.
Another simple trick is increasing the fork oil height. Since oil is harder to compress than air, having more oil will help stiffen it up, especially as the forks get closer to bottoming,
Just be careful not to add too much oil or else you can blow the seals. Please refer to your OEM service manual for maximum oil height (minimum air gap).
DIY custom re-valve for cheap
The stock forks are pretty basic when it comes to the valving technology, but adding some Race Tech Gold Valve Emulators (Amazon) is a fairly affordable way to feel some real performance increase. You’ll be able to push harder and ride faster without bottoming out the forks.
If you don’t mind taking the forks apart, it’s a good bang for your buck fork upgrade.
Bracing the fork
If the stock forks still feel too mushy to you, then they might just be flexing too much. When you’re riding aggressively or have a lot of weight on a bike, the forks will flex and bend as it compresses and rebounds - sometimes too much to be comfortable.
Installing a CNC machined fork brace (Amazon) gives the front forks more rigidity, giving you more stability, especially at high speeds or if you’re doing a lot of off-road riding.
Shock upgrade
You can buy a complete aftermarket shock (Procycle) that will give you much better performance, but at a high cost ($500-1500). If your finances are tight, then a simple shock spring upgrade (Amazon) can be done for about 100 dollars if you do it yourself, which takes about an hour to do.
Can you lower the seat height?
Yes, a simple and affordable set of lowering links (Amazon) can be installed on your KLR650 rear shock linkage. This lowers the rear of the bike about 2”, making it easier to get on, ride, and come to a stop - especially if you have short legs like me!
Two issues with a lowering link that can be resolved
One problem is that you might have to shorten the stock kickstand so that it doesn’t stand upright too much - it might tip over if you don’t place it in a spot where it’s leaned over far enough.
The other issue is that with the rear end lower, your KLR 650 won’t handle as well. You will need to balance the suspension by lowering the front, which can be done by lowering the forks in the triple clamps - just mark or record the original spot in case you want to put it back.
The good news is that if you increase your riding skill and balance so that you don’t need a lower seat height, you can easily install the stock linkage back onto your bike.
Gearing - cheap performance upgrade
The stock KLR 650 sprocket gearing is a pretty good compromise between acceleration and top speed or cruising speed. But, if you want more of one or the other, then a simple gearing swap can really make a difference in how your motorcycle runs - and it’s one of the cheapest mods!
Better acceleration for off-road riding
Changing the gearing doesn’t change the torque or the horsepower, but you can have quicker acceleration because the gears feel closer together so that the RPM (power) doesn’t drop as much when you shift up.
If you want a lower 1st gear and better acceleration for off-road or trail riding so you don’t have to use the clutch as much, going down to a 14T front sprocket (Amazon) is super cheap and fairly easy to do.
You’ll just have to adjust the chain tension because it will be too loose with a smaller countershaft sprocket.

High top speed & cruising for the highway
On the flip side, if you’re doing more long-distance riding on the highway or freeway, your 650cc Kawasaki engine will be buzzing pretty well at 65-70 mph with stock gearing. Some people complain of getting numb hands from these vibrations, which make it hard to hang on and use the controls.
Going up to a 16T front sprocket (Amazon) is an easy way to bring the cruising RPM down for a few reasons. It reduces wear and tear on your engine, vibrates less, and you can potentially get better fuel economy if you’re cruising at high speeds.
Engine
The 650cc 4-stroke KLR engine is liquid-cooled, which typically produces more power compared to an air-cooled engine, but that’s not what makes this engine great. It’s great because it’s smooth, easy to ride, and super reliable - but that doesn’t mean you can’t upgrade it!
Big bore kit
Installing a big bore kit is not only a good way to add power, but a quality big bore piston kit (Schnitz) can also fix an oil burning issue, as well as reduce engine vibration. The only drawback is that you have to bore the cylinder out, so I recommend taking it to a machinist you trust and giving them the new piston so that they match for proper clearance.
A 685cc big bore will work on any KLR650 1996 or newer. The older engines have a cylinder wall that’s too thin to safely bore out, but you can use a ‘96 or newer cylinder on your older KLR because they are interchangeable.
You can also go up to a 692cc, 705cc, or 719cc big bore piston (EagleMike), but you’ll need an aftermarket cylinder liner for the 705 and 719 cc big bore piston kits.
Camshaft
Upgrading to a Hot Cams Intake camshaft (Amazon) is good if you already modified the intake, engine, and exhaust. You may not see a huge power increase with a camshaft upgrade by itself, but the stock cam will be choking your engine down if you’ve done everything else.
A quality porting job on the cylinder is also necessary if you want everything to work well together. You can easily get 20-30% more horsepower with all these mods when done right.
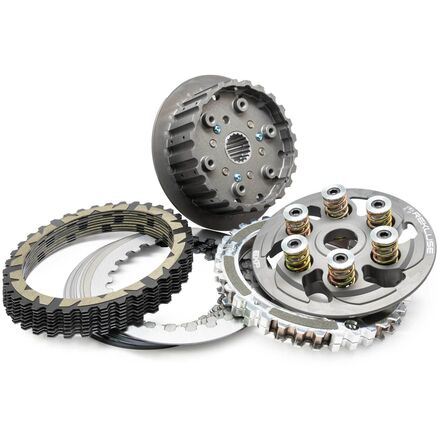
Auto clutch
Tired of using the clutch or just want to level up your low-speed skill? A Rekluse RadiusX clutch kit (Amazon) is not cheap, but it will transform your KLR650 if you normally use the clutch often.
You can still use the clutch lever to slip the clutch, but you don’t need to touch it when you put your bike in gear or shift it.

Exhaust
If you don’t need more power and don’t care about sound, looks, or weight, then there’s no point in upgrading to an aftermarket exhaust on your Kawasaki KLR650. But, if you DO want to upgrade one of these, then there are quite a few options, from head pipes to mufflers.
All of them will increase the sound output, but some will have a higher decibel rating than others if you’re concerned about having an obnoxiously loud motorcycle.
Here are your top KLR650 exhaust pipe options:
- Stainless Head Pipe (Amazon) - Cheapest head pipe upgrade for 1st gen KLR
- FMF Powerbomb head pipe (Motosport) - Better power & less sound
- Big Gun Evo slip-on (Amazon) - Cheapest muffler upgrade (loud)
- DG V2 slip-on (Amazon) - High-quality muffler upgrade (loud)
- FMF Q4 slip-on (Motosport) - Quietest muffler upgrade
- Two Bros S1R Black slip-on (Motosport) - Best looking & sounding muffler upgrade
Do you have to re-jet the carb after installing an aftermarket exhaust?
In most cases, yes, you will have to make a jetting adjustment. It may be as simple as turning the fuel screw, which only takes a few minutes. If you don’t properly tune the jetting, you may have issues, such as:
- Backfiring
- Bogging
- Hard to start
- Less reliability
Tires
Tires are maintenance items, so you need to replace them every so often, but you can also FEEL a huge gain in performance and confidence if you use the right kind of tires for the riding you’ll be doing. The stock KLR 650 tires are a decent 50/50 combo, meaning they’re neither biased for the dirt nor the pavement, so they’re not great at either.
- Best KLR 650 tires for off-road: Kenda Big Block (Amazon) - Jimmy Lewis recommends running it in the “Hard” direction
- Best KLR 650 tires for highway/pavement: Pirelli Scorpion rear (Amazon)
Just for reference, here are the stock KLR650 tire sizes:
- Front: 90/90x21
- Rear: 130/80x17
Seat upgrade
Whether you want a lower seat height or you just want more comfort for long rides, there’s a simple (although somewhat expensive) option to upgrade from your stock seat. The Kawasaki OEM low seat (Amazon) is a good choice if you just want a lower seat height of about 1.5 inches so that you can touch the ground more easily when starting and stopping.
For a more customized and comfortable seat, you can upgrade to the Sargent low seat (Amazon) which is also lower to the ground but gives you better comfort because it’s shaped properly and uses higher-quality materials.
How much is it worth to you to have a butt that’s not so sore after a long ride?
Skid plate
Are you going to be gliding over logs or smashing into rocks? Then you’ll want a quality skid plate to protect your frame cradle and engine.
The last thing you want is a rock or obstacle punching a hole through your engine case, leaving you stranded in the middle of nowhere. This skid plate is for 1st gen (87-07), and this one (Amazon) is for a 2nd gen (08-18)
Crash protection
If you know you’re going to be falling over or you just want some extra insurance, adding some steel crash bars is another simple mod to protect your engine, radiator, and gas tank.
These are the top picks on Amazon based on which model year you have:
Wind protection
The stock windscreen is not very effective on the KLR 650. You’ll get beaten up from a lot of “buffeting” if you cruise on the highway, which gets exhausting if you’re riding long-distance.
By installing an aftermarket windshield/screen, you can greatly reduce the amount of turbulent air so that your chest and head won’t get pushed around like you’re a bobblehead. There are a few different screen height options, depending on how you want it to function and look.
Here are the top KLR 650 windshield upgrades on Amazon:
Hand protection
There are a few different types of handguards that can help more or less, depending on where you’re riding. If you’re riding off-road and expect to hit your bars on the trees or fall on some rocks, adding some bark-buster handguards (Amazon) is some extra insurance.
It not only protects your precious hands and fingers, but it can also prevent your brake and clutch levers from breaking off, making it hard or impossible to use the front brake and clutch.
Headlight upgrade
If you’re riding at night, increasing the light output will not only make it easier for you to see what’s coming up on the trail but you’ll also be seen more easily by oncoming drivers on the road. The stock headlight is okay, but you can definitely upgrade the lighting for cheap these days without having to upgrade the stator.
Here are some affordable LED bulb upgrades based on which year KLR650 you have:
- Gen1 (87-07) H4 LED (Amazon)
- Gen2 (08-18) H7 LED (Amazon)
GPS Speedo dash upgrade
Whether you want a more modern look or more features, upgrading to a Trail Tech Voyager Pro GPS (Motosport) is one ‘farkle’ (mod) that may or may not be right for you. It’s not cheap, but if you want a speedo dashboard that can do virtually anything, including GPS and “buddy tracking”, this is a nice upgrade.

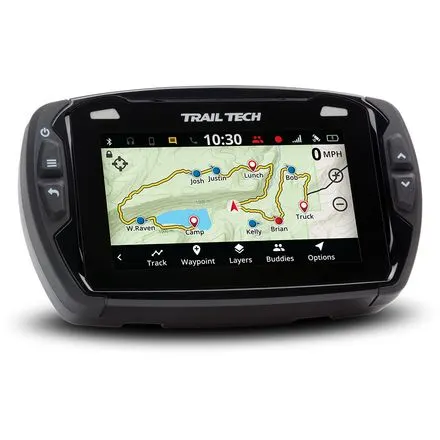
The buddy-tracking system uses your GPS location and leaves a “track” on your map, showing your riding buddies where you’ve ridden and are currently located so that you don’t get lost in the middle of nowhere! The only drawback is that you have to convince your “mates” to get the Voyager Pro GPS as well.
Putting all the mods together
When you combine the right mods, you can have a completely different (and better) running and handling dirt bike. That also means you can ruin its handling, reliability, and performance if you aren’t properly planning ahead.
That’s why I made a quick list of the top upgrades based on your specific needs and where you’ll be riding most. I also added a list at the end that adds several cheaper accessories that can be useful on your KLR650 if you do a lot of riding.
Best KLR 650 upgrades for trail riding:
- Jetting
- Shorter gearing
- Off-road tires
- Skid plate
- Crash bars
- Hand protection
Best KLR 650 upgrades for dual sport & ADV riding:
- Jetting
- Taller gearing
- Tires
- Crash bars
- Windshield
Top cheap & helpful mods for your KLR 650:
- Tusk low-profile magnetic drain bolt (Amazon) - to catch metal shavings in the oil
- Kickstand foot pad (Amazon) - to prevent kickstand from sinking in sand/soft terrain
- Minimalist waterproof 1.5L tank bag (Amazon) - small, lightweight storage for phone/GPS
- Tusk Extended folding shift lever (Amazon) - If you have big feet/boots and is less likely to bend and break off-road
- Atlas throttle lock (Amazon) - a simple “cruise control” device to give your right hand a rest on the highway
The best mod to make you a better rider
There are many mods to make your KLR 650 faster and more comfortable, but there’s one mod that many people skip because they don’t think they need it. The best mod is a new rider - YOU, and a common mistake is just riding and trying to figure it out on your own. I want to show you how to prevent crashes that can lead to injury or damage to your precious bike - click here to learn how.

carlos franco
Wednesday 21st of February 2024
Hello, your recommendations to improve the performance of the KLR are very accurate. I have a 2008 Gen 2 model and years ago I changed the lights for H7 LED types, but they have already reached their useful life and I can no longer find the one I had bought on the market. Can you recommend me a reference that is in the range of less than 50 dollars and that does not have more than 40 watts per bulb. I am very grateful for your advice. Sincerely, Carlos Franco
Kelley Fager
Thursday 22nd of February 2024
Hey Carlos, I'm glad you enjoyed my article. I updated the link in this article to the Gen 2 LED headlight bulb on Amazon (affiliate link). You can also click here to view it. Hope that helps, and thanks for your support - we really appreciate it!