One of the most overlooked dirt bike maintenance items is proper chain tension.
Most riders know a loose chain can slap around or even fall off…
…but what many newer riders don’t realize is that a chain that’s TOO tight can actually cause even more expensive damage.
I’ve seen riders:
- destroy countershaft seals
- wear out sprockets early
- damage bearings
- create stiff suspension movement
- and crack engine cases from chain problems
The tricky part is that dirt bike chain tension changes as the suspension moves through its travel.
So if you tighten the chain incorrectly while the bike is on a stand, it may become dangerously tight once you sit on the bike or hit bumps on the trail.
In this guide, I’ll show you:
- How tight a dirt bike chain should be
- Symptoms of a chain that’s too tight
- Symptoms of a loose chain
- How to properly adjust chain slack
- Common beginner mistakes
- And how to prevent expensive drivetrain damage
Watch: How To Properly Adjust A Dirt Bike Chain
How Tight Should A Dirt Bike Chain Be?
Most dirt bikes should have roughly:
1.5–2 inches (38–50mm) of chain slack
…but the exact specification depends on:
- the bike
- suspension geometry
- swingarm design
- chain guide setup
Always check your owner’s manual for the exact spec.
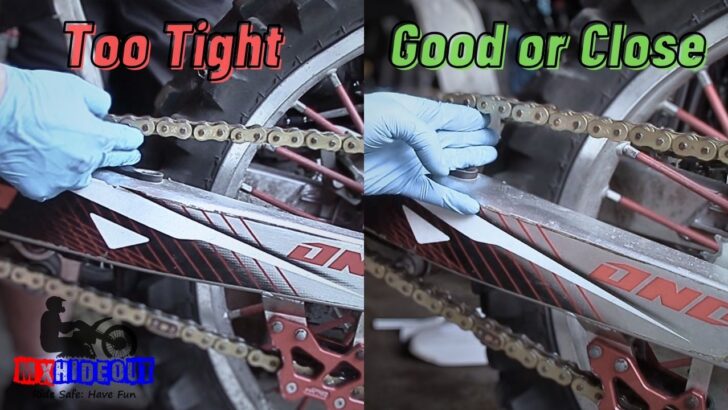
A quick beginner-friendly method is:
- place the bike on a stand
- push up on the bottom chain section near the rear chain guide
- measure total movement up and down
The chain should move freely without becoming tight like a guitar string.
If it feels extremely tight with very little movement:
It’s probably overtightened.
Why Dirt Bike Chain Tension Changes
This is the part many beginners don’t understand.
As the rear suspension compresses:
- the swingarm moves upward
- the rear axle changes position
- and the chain tightens
The chain actually becomes TIGHTEST when:
- the countershaft sprocket
- swingarm pivot
- and rear axle
line up in a straight line.
That means:
a chain that feels “perfect” on a stand may become WAY too tight while riding.
This is one of the biggest reasons riders accidentally overtighten their chains.
Symptoms Of A Dirt Bike Chain That’s Too Tight
A tight chain can cause much more than premature chain wear.
Common symptoms include:
- stiff rear suspension feel
- excessive drivetrain noise
- whining or binding feeling
- premature sprocket wear
- leaking countershaft seal
- poor suspension movement
- tight spots while rotating wheel
- transmission bearing wear
- chain stretching quickly
In severe cases:
a chain can bind hard enough to damage the countershaft area or crack the engine case.
That gets expensive fast.
Symptoms Of A Dirt Bike Chain That’s Too Loose
A loose chain is also bad.
Common loose chain symptoms:
- chain slap against swingarm
- inconsistent throttle feel
- chain skipping teeth
- noisy drivetrain
- uneven sprocket wear
- chain derailment
- damaged chain guide
- excessive vibration
A very loose chain can even come off the sprocket entirely.
That can:
- jam the drivetrain
- damage the engine case
- lock the rear wheel
- or leave you stranded on the trail
The MOST Common Dirt Bike Chain Adjustment Mistake
The most common beginner mistake is:
Adjusting the chain too tight while the bike is on a stand.
Why?
Because the suspension is fully extended on the stand.
Once the rider gets on the bike:
- the suspension compresses
- the chain tightens significantly
Many riders think:
“Tighter chain = safer.”
But in reality:
Slightly loose is usually MUCH safer than too tight.
How To Properly Adjust A Dirt Bike Chain
Step 1: Put The Bike On A Stand
Lift the rear wheel off the ground so the wheel spins freely.
This makes the adjustment much easier.
Step 2: Clean The Chain First
Before adjusting anything:
- remove dirt
- mud
- sand
- old chain lube buildup
A dirty chain wears out faster and makes inspection harder.
I usually recommend:
- chain cleaner or mild degreaser
- brush
- rag
- fresh chain lube afterward
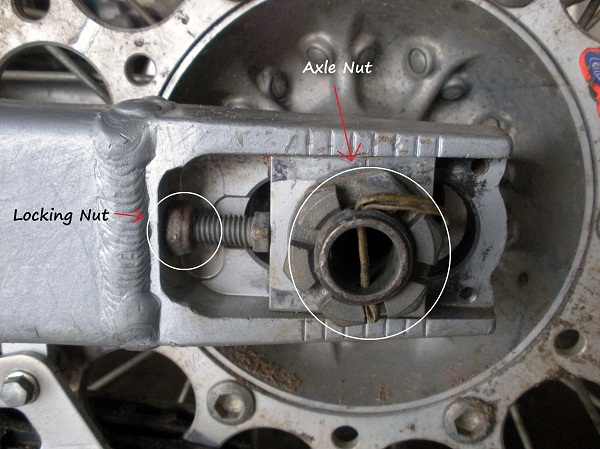
Step 3: Loosen The Rear Axle Nut
Most dirt bikes use:
- a large axle nut
- plus smaller chain adjuster lock nuts
Loosen the axle enough so the wheel can slide slightly forward and backward.
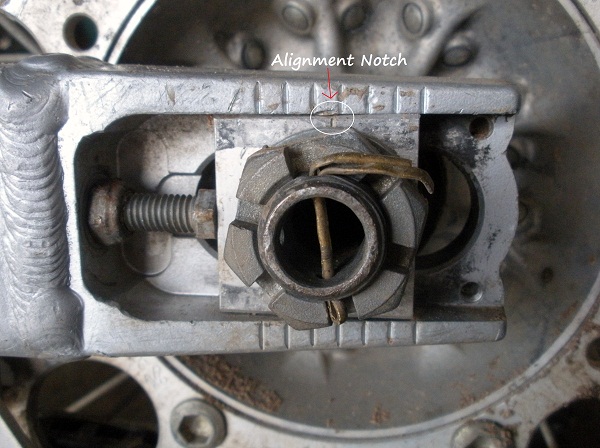
Step 4: Adjust Chain Slack Evenly
Turn the chain adjuster bolts evenly on BOTH sides.
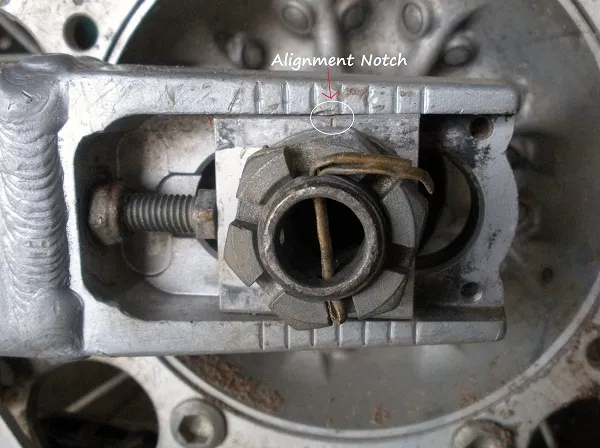
Most swingarms have alignment marks near the axle blocks.
Make sure:
- left and right marks match
If they don’t:
- the rear wheel may become misaligned
- handling can feel weird
- chain/sprocket wear increases
Step 5: Recheck Chain Slack
After adjustment:
- spin the rear wheel
- check for tight spots
- remeasure slack
Chains often tighten slightly after torquing the axle.
Always recheck.
Step 6: Tighten The Axle Nut
Once chain tension and wheel alignment are correct:
- tighten axle nut to spec
- tighten lock nuts
- recheck slack one more time
Done.
Should You Check Chain Slack With The Rider On The Bike?
For maximum accuracy:
Yes.
Especially if:
- Suspension has been modified
- Lowering link installed
- Sag changed significantly
- Aftermarket shock used
The most accurate method is checking chain tension with:
- suspension compressed near its tightest point
But for most trail riders:
Following factory slack specs works perfectly fine.
How Often Should You Check Your Dirt Bike Chain?
I recommend:
Checking chain tension every ride.
Especially if:
- the chain is newer
- riding muddy conditions
- riding sand
- riding aggressively
- chain recently adjusted
Chains naturally stretch and wear over time.
A quick 30-second inspection can prevent expensive problems later.
Chain Maintenance Tips To Make Your Chain Last Longer
1. Keep It Clean
Mud and sand destroy chains quickly.
2. Lubricate It Regularly
Especially after washing or wet riding.
3. Don’t Overtighten It
This is probably the biggest beginner mistake.
4. Replace Worn Sprockets With The Chain
Old sprockets wear out new chains quickly.
5. Check For Tight Spots
Rotate the wheel and inspect entire chain length.
Recommended Chain Maintenance Tools
These are some tools that make chain maintenance MUCH easier:
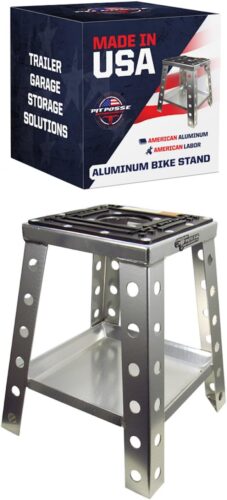
- Chain Stand (Amazon)
Makes wheel spinning and adjustment easier.
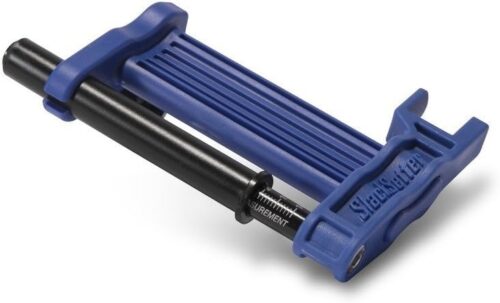
- Motion Pro Chain Slack Tool (Amazon)
Helpful for beginners learning proper chain tension.
- Chain Brush + Cleaner (Amazon)
Helps prevent premature wear.
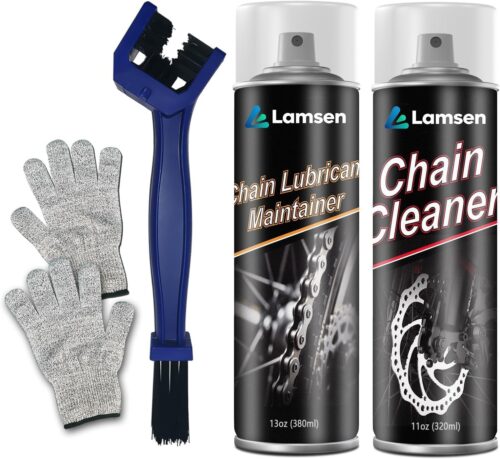
- Quality Chain Lube (Amazon)
Especially important for muddy or wet riding.
- Torque Wrench (Amazon)
Prevents over-tightening axle nut.

Tight Chain vs Loose Chain Comparison
| Problem | Too Tight Chain | Too Loose Chain |
|---|---|---|
| Suspension movement | Restricted | Normal |
| Sprocket wear | High | High |
| Bearing damage | Possible | Less common |
| Chain derailment | Less likely | More likely |
| Chain slap | Minimal | Excessive |
| Countershaft seal wear | Common | Rare |
| Ride feel | Harsh/stiff | Sloppy/noisy |
| Risk of catastrophic damage | High | Moderate |
Can A Tight Chain Damage Transmission Bearings?
Yes.
A chain that’s too tight constantly pulls on:
- the countershaft
- bearings
- seals
- drivetrain components
Over time this can lead to:
- leaking seals
- worn bearings
- drivetrain drag
- premature wear
That’s why proper chain slack is so important.
Final Thoughts
A properly adjusted dirt bike chain helps:
- improve reliability
- reduce wear
- protect expensive parts
- improve suspension performance
- and keep your bike safer to ride
Most newer riders are actually more likely to run their chain TOO tight rather than too loose.
So if you’re unsure:
Don’t overtighten it.
A few minutes of chain maintenance can prevent hundreds (or thousands) of dollars in drivetrain damage later.
Related Articles
- Best Beginner Dirt Bikes For Trail Riding
- How To Lower A Dirt Bike Seat Height
- Dirt Bike Clutch Problems & Fixes
- Dirt Bike Chain Keeps Coming Loose (Coming Soon)
Want More Beginner-Friendly Trail Riding Tips?
If you want to build confidence and ride trails with more control (without constantly feeling tense or overwhelmed), grab my FREE Trail Confidence Guide below.

ron
Monday 29th of April 2013
ive gotten chain slap what do i do