Does your 2 stroke dirt bike need a top-end rebuild? How long should a top-end last, and how much does a rebuild cost?
In this article, I'm going to show you:
- What parts are involved in a top-end rebuild
- Signs your 2 stroke dirt bike needs a rebuild
- How much a rebuild will cost you
- The simple steps to replace the top end
- And how long you can expect it to last before needing another rebuild
Is a top end rebuild just maintenance or a repair?
Rebuilding a top-end is actually considered maintenance, but most people call it a repair because they wait until their engine is blown to fix it.
Low compression is a good sign that your dirt bike needs a new top-end so you can save time and money in the long run. This means that you should be aware of how your dirt bike is running each time you go riding.

What Is A Top End Rebuild On A 2 Stroke Dirt Bike?
It is the removal and inspection or replacement of the piston and/or piston rings. The cylinder and cylinder head also need to be inspected for wear or damage.
How Often Should You Rebuild A 2 Stroke Top End?
How many hours can I expect to get out of my top-end? That is a very difficult question to answer because there are so many variables.
With that said, there is a way to roughly determine how long your engine can last and when you should expect it to need a rebuild.
How you ride your bike makes a huge difference
Probably the most important factor to the longevity of your dirt bike’s engine is how you ride.
Are you more of a novice rider that rides your bike very easily at lower RPM’s? This could be through trail riding or just riding around your farm or property.
As a general rule, the less rotations your engine spins (riding at lower RPM) the more hours it will last.
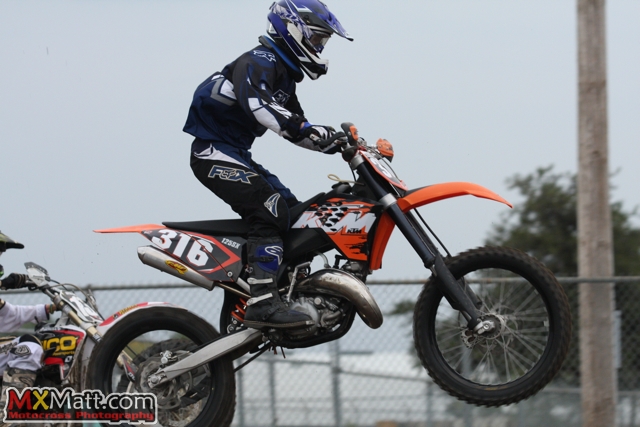
On the flip side, you may be an intermediate to expert level rider that rides very aggressively. Most dirt bikes (especially motocross bikes) make their peak horsepower above 8,000 RPM, so riding at high RPM is important to riding faster.
This is mostly true for motocross or high speed off-road racing. Riding like this will require more maintenance, which equates to more frequent engine rebuilds.

What Size 2 Stroke Dirt Bike Do You Have?
Why do so many riders buy a 450cc 4-stroke when they don’t need that much power for their type of riding? The most common reason is that they are cheaper to maintain over the long haul.
Why? Because you don’t have to rebuild them as often as a 250F or 125cc 2-stroke motocross or enduro bike.
The same goes for 250 and 300cc 2 strokes. Not only do they have considerably more low-end torque, but you can usually ride them about twice as many hours as a 125 or 150cc 2 stroke before needing to tear down and replace top-end parts.
Are You Properly Maintaining Your 2 Stroke?
This one is obvious, but it needs repeating because it's easy to get lazy (that includes myself sometimes). Doing routine maintenance on a dirt bike is crucial to making it last longer.
Simple but required maintenance includes keeping the air filter clean, changing the oil at proper intervals, having your carb properly jetted, and using a good pre-mix oil ratio and gas.
How Do I Know When To Rebuild My Top End?
There are some signs and symptoms that your dirt bike will tell you when it needs attention. Low compression is the most common sign that your 2 stroke needs to be rebuilt.
These are also symptoms of a worn top-end:
How Much Does It Cost To Rebuild A Top-End 2 Stroke?
The cost of rebuilding a 2 stroke dirt bike top end can vary from under $50 to $500+. It depends on what parts need to be replaced and if you’re doing the rebuild yourself or paying someone else to do the work.
Here is a list of parts you may need to do a complete top-end rebuild. This does not include the cost of tools, most of which are pretty basic.
Top-End Parts Costs Breakdown:
- Gasket kit - $20-40
- Piston kit (piston, rings, wrist pin, circlips) - $80-150
- Cylinder plating - $250 (after shipping)
- New cylinder - $300-500
- Labor (paying a shop) - $150
Total - $400 (DIY); ~$550 (Paying a bike shop)
How To Rebuild A 2 Stroke Top End
Trying something new can be intimidating. This is especially true when trying to fix your dirt bike.
It's easy to keep procrastinating doing a top-end rebuild because you're scared that you might mess something up.

However, if you just do one thing at a time and do things properly then it's actually pretty easy. After you do it once, the second time around is so much easier.
To put it into simple steps, here is how to rebuild the top-end of a 2 stroke dirt bike:
- Wash the bike
- Setup/prep a work space
- Drain the coolant
- Remove the seat and gas tank (unless there's enough room to work with)
- Remove the top motor mount (if necessary)
- Remove the cylinder head
- Unhook power-valve (if applicable)
- Remove cylinder (inspect for wear)
- Remove piston circlip, wrist pin, and piston
- Remove any old gasket material/clean mating surfaces
- Inspect and replace piston
- Install cylinder and base gasket (torque specs)
- Attach power-valve assembly (if applicable)
- Install cylinder head with new gasket/o-ring (torque specs)
- Re-install motor mount
- Re-install gas tank and seat
- Attach radiator hoses and replace coolant (add more after running engine)
Preparing Makes Things Easy
It's often said that the prep work is half the battle. Well, there's definitely some truth to that.
In order to make your top-end rebuild go smoothly, you need to have a clean dirt bike and a somewhat clean and organized work space.
This doesn't mean you need to have a large shop that is spotless, but having enough room to get around your bike and a small bench really helps.
Cleaning your dirt bike is not only helpful to see what you're working on, it also keeps dirt out of the engine. Dirt destroys engines, so cleaning your bike before working on it will prevent dirt from accidentally falling in the engine.
Draining Coolant
Now might be a good time to flush your bike's cooling system. But if the coolant is still fresh, drain it into a clean bucket and save it for when you refill the radiator after rebuilding the top-end.
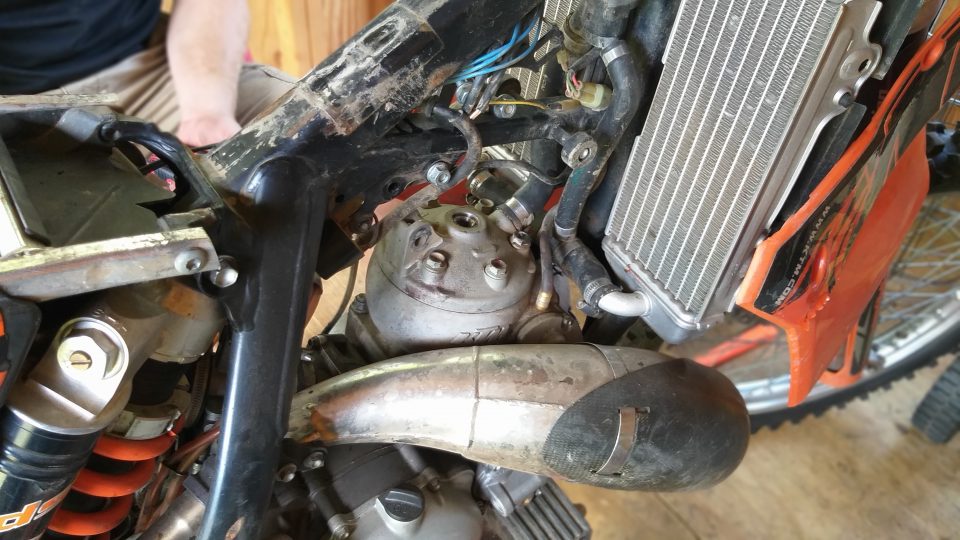
What Do I Need To Remove?
Some 2 stroke dirt bikes have more room under the gas tank than others, but most bikes will require you to remove the seat, tank, and radiator shrouds.
Most 2 strokes have a motor mount on the cylinder head, so that needs to come off. The nuts on the mount and cylinder head may be pretty snug, so I sometimes need a good breaker bar (Amazon) to break them loose.
What to do with corroded nuts/studs
Penetrating oil or lubricant will help if the threads are corroded and seized to break the cylinder stud nuts loose.
To get the cylinder off, you may need to remove the power-valve cover and remove a nut or bolt to disconnect it.
What to do if the cylinder is stuck
If the cylinder is stuck, don't try to pry it off with a screwdriver or pry bar. That will surely damage the mating surfaces.
Instead, use a soft plastic or rubber dead-blow hammer (Amazon) and tap on the side until it knocks loose, then you can carefully pull the cylinder off. Don't let the piston drop in case it is reusable.
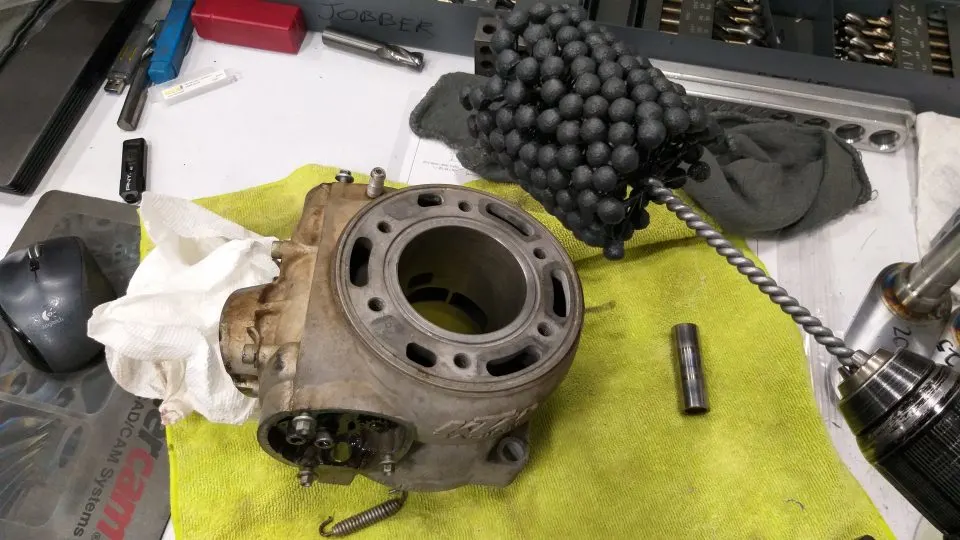
Inspection Of Piston & Cylinder
If you rebuild the top-end often enough, you can sometimes just replace the piston ring(s) if the piston and cylinder are still good.
To check a piston ring for wear, place it by itself in the cylinder and use a feeler gauge (Amazon) to see how big the gap is.
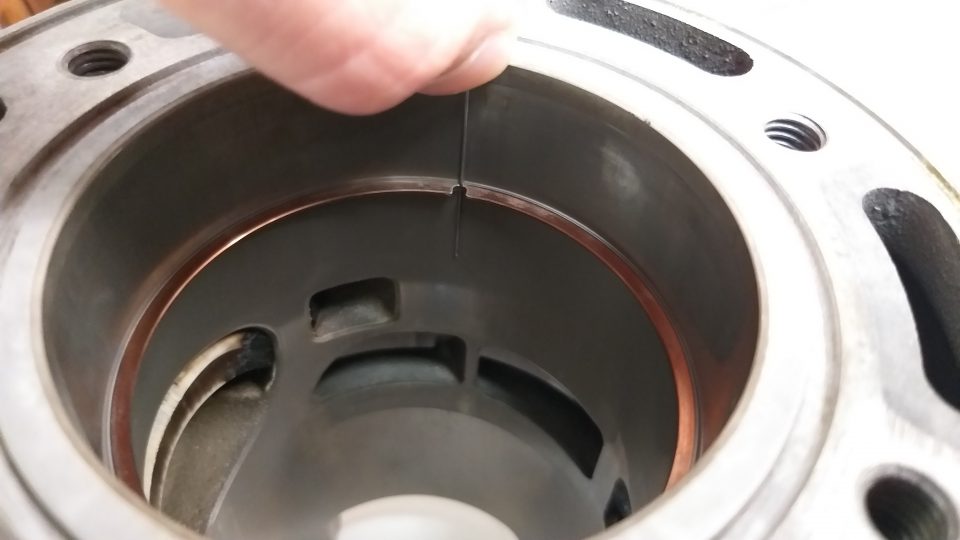
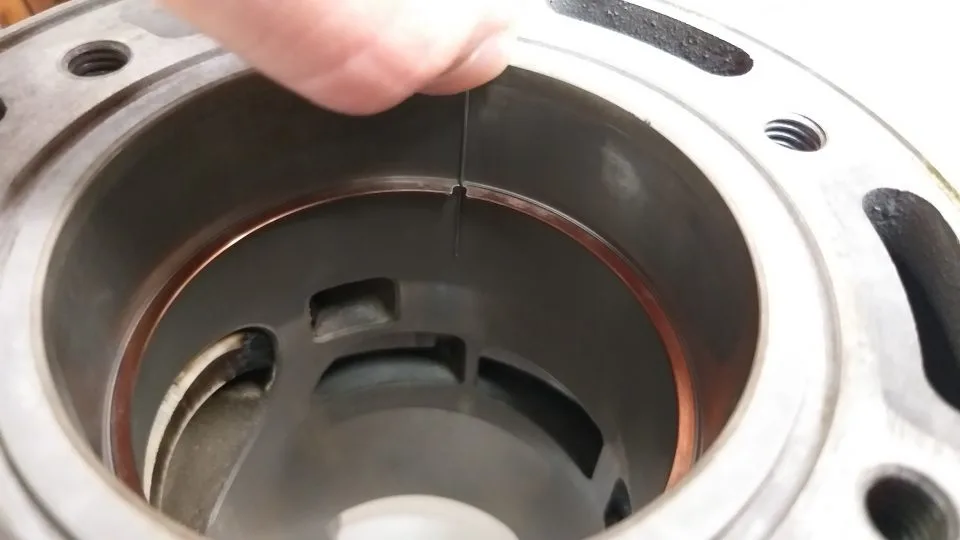
This number will probably be .010-.020" depending on what your factory service manual says. An aftermarket piston should have instructions if the ring gap is different.
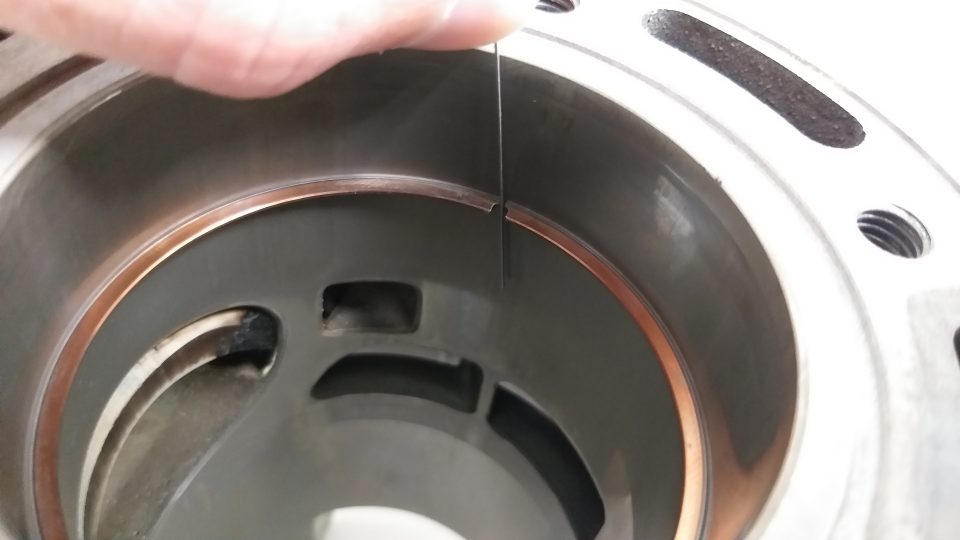
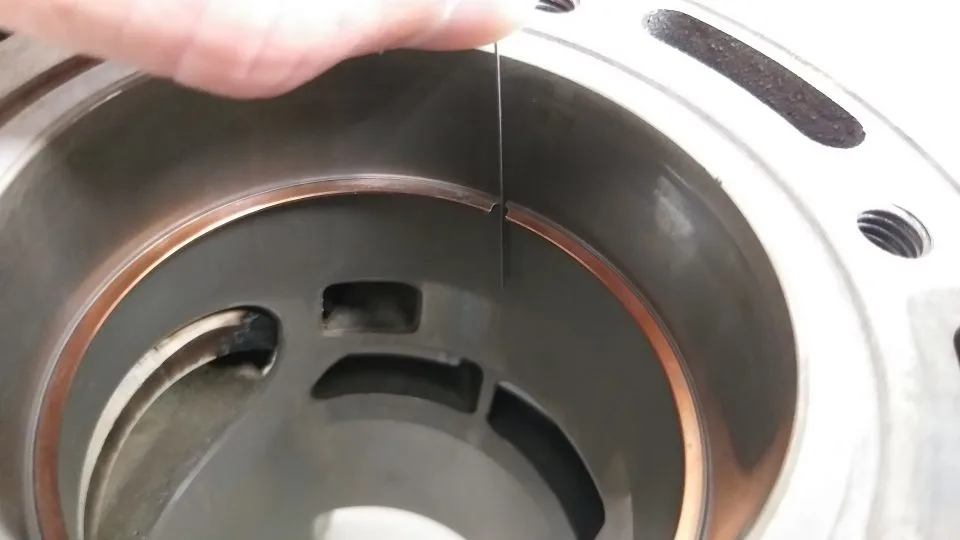
A cylinder in good shape will not have any scratches or "physical wear", and there should still be "cross-hatching" on the entire bore. Cross-hatching is the visible lines that are uniformly diagonal or spiraling from the honing process.
Cross-hatching is required on the cylinder wall because it holds a small layer of oil that lubricates and seals it to the piston ring(s). If the cross-hatching is worn, the compression will be lower.

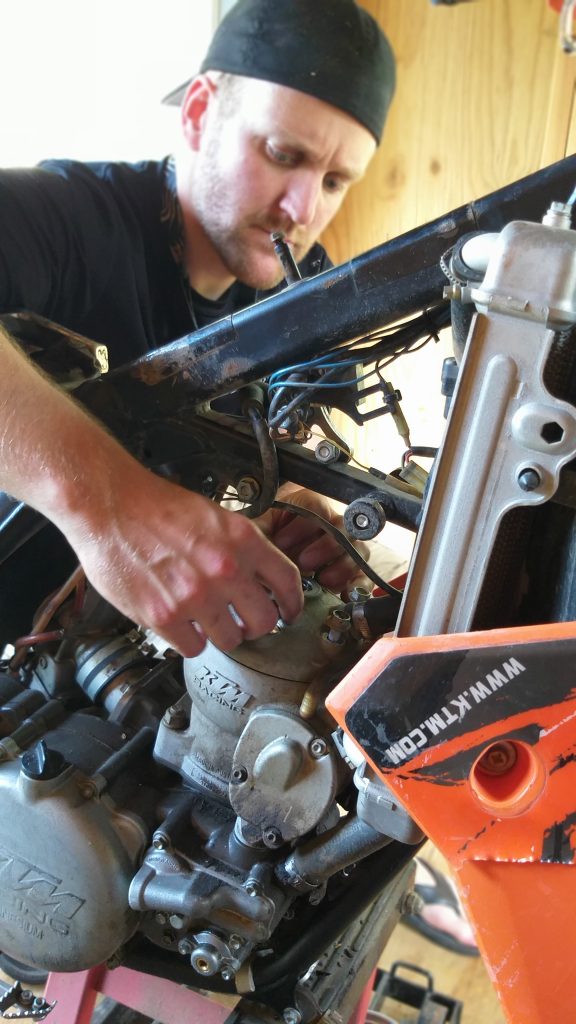
Removing & Installing Piston C-Clips
The removal and installation of the cir-clips may be the most difficult part of a top end rebuild. Removing them can be done with a small pick or flat blade screwdriver just by prying one off.
I recommend wearing safety glasses because the clip can come flying off in any direction. You only need to remove one to get the wrist pin and piston off of the crankshaft connecting rod.
Don't Install The Piston Backwards
When installing a piston on the con-rod, make sure you point it the right direction. It will either have an arrow or letter stamped on it. If there is an arrow, it needs to be pointed towards the exhaust side.
If the letter "E" is on top of the piston, that side needs to face the Exhaust as well. If the letter is "I" then it needs to face the Intake side.
To install a new circlip, start with the open end facing up or down. Push one side in the groove with your thumb, and then work your way around until the circlip is in the bore.
You can finish it off with a pick as well. This video shows it well.
Fresh Gasket Surface
It's extremely important to have a clean and flat surface for the gaskets or o-rings to properly seal. If they don't seal, you could lose compression, blow the gasket, or get coolant in the cylinder, which will quickly destroy your freshly rebuilt engine.
A gasket scraper (Amazon) or a utility knife blade with a careful hand can scrape off old gasket material. It's a tedious job if the gasket is old, but having a reliable engine is worth the effort.
Proper Torque In A Pattern
When tightening the cylinder and head stud nuts down, you need to do it a certain way. If you tighten each nut down one at a time then you may warp the cylinder or head, and then you will blow the gasket and cause major problems in a hurry.
Tightening the nuts with a certain amount of force is important so that they stay tight and don’t vibrate loose. But over tightening the nuts can cause them to strip out and ruin the threads, leaving you with an even bigger job.
How to properly tighten the cylinder & head down
To properly tighten a cylinder and cylinder head, work in a star or criss-cross pattern. Just barely snug them with light pressure the first time around, then come back again and get them a little tighter.
On the final pass, use a torque wrench and tighten each nut to the proper torque specs given in the factory service manual. This will ensure that the cylinder and head will stay flat and the nuts won’t come loose.
Button Everything Up!
Now you can put everything else back on that you removed to do the top-end rebuild. This can include the radiators, hoses, gas tank, seat, plastics, etc.
Make sure you top off the coolant and oil if you haven’t already. Now it’s time to add some fresh pre-mix gas and break in your 2-stroke engine to get the most power and reliability!
How to break in your new 2 stroke engine
Engine break-in is important, right? Everyone has there own opinion, but who's is right? I always do mine the same way since learning how and never had a problem - Click here for my step by step guide on how to break an engine in.